How To Teach A Kid To Ride A Bike : Teaching a child to ride a bike is a significant milestone. Whether your child is just starting out or needs help transitioning from a balance bike to a pedal bike, there are effective methods to teach them. By focusing on balance first and then introducing pedaling, you can help your child gain confidence and learn to ride a bike with ease. Let’s explore the step-by-step process of teaching a kid to ride a bike.
Key Takeaways:
- Start teaching a child to ride a bike by assessing their readiness both physically and mentally.
- Choose the right bike and safety gear, ensuring it fits the child’s height and has hand brakes for added safety.
- Begin with a balance bike to help the child learn balance and develop crucial skills.
- Remove the pedals from the bike to focus on balance mastery before introducing pedaling.
- Once the child has mastered balance, reattach the pedals and teach them proper pedaling technique.
Assessing Readiness: When Is Your Child Ready to Ride?
Before teaching your child to ride a bike, it’s important to determine if they are physically and mentally ready. Most children are ready to learn between the ages of three and a half to four and a half years old.
- Physical readiness: Look for signs of interest and physical readiness, such as the ability to touch the ground with their feet flat while seated on the bike.
- Bike size: Ensure your child has the right bike size that allows them to comfortably reach the handlebars and pedals.
Assessing readiness ensures a smoother learning process for your child, as they should be able to balance and move the bike effectively.
| Signs of Readiness | Average Age Range |
|---|---|
| Interest in riding a bike | 3.5 – 4.5 years old |
| The ability to touch the ground with feet flat on the bike | 3.5 – 4.5 years old |
| Appropriate bike size | 3.5 – 4.5 years old |
Choosing the Right Bike and Safety Gear

When teaching a child to ride a bike, it’s essential to have the right equipment. The right bike and safety gear not only enhance your child’s learning experience but also prioritize their safety. Let’s explore the key factors to consider when choosing a bike and safety gear for your child.
Choosing the Right Bike
Start by selecting a bike that is appropriate for your child’s age and size. The bike should have two wheels, as this allows your child to learn essential balancing skills. Ensure that the bike’s seat height allows your child to comfortably touch the ground with both feet while sitting on the seat. This will help them feel secure and confident while riding. Additionally, make sure the bike has hand brakes for added safety and to teach your child proper braking techniques.
| Bike Features to Consider: | Explanation: |
|---|---|
| Two Wheels | Helps your child develop balance skills. |
| Appropriate Seat Height | Ensures comfort and stability for your child. |
| Hand Brakes | Teaches your child proper braking techniques. |
Investing in Safety Gear
Alongside the bike, investing in proper safety gear is crucial to protect your child while they learn to ride. The most important piece of safety gear is a well-fitted bike helmet. It should cover your child’s forehead and sit level on their head. The helmet should also have adjustable straps to ensure a snug fit. Remember, a helmet should always be worn when riding a bike, regardless of the terrain or riding ability.
Apart from a helmet, consider other safety gear such as knee and elbow pads to protect the vulnerable joints during falls. These additional protective measures can provide peace of mind and minimize the risk of injuries.
Starting with Balance: Using a Balance Bike

One effective method to teach a kid to ride a bike is to start with a balance bike. A balance bike is a pedal-less bike that allows children to focus solely on learning to balance. By removing the pedals, your child can gain confidence in maintaining their balance on two wheels. This approach helps them develop crucial skills before introducing pedaling.
Why Choose a Balance Bike?
A balance bike is a great learning tool because it allows children to practice balancing without the added complexity of pedaling. It provides a safe and comfortable environment for your child to gain confidence and improve their coordination.
With a balance bike, your child can learn to sit comfortably and control the bike using their feet to push off the ground. This method teaches them how to shift their weight to maintain balance, an essential skill for riding a bike.
By starting with a bike without pedals, your child can focus on perfecting their balance first. As they gain confidence and stability, they will be better prepared to transition to a pedal bike.
How to Get Started with a Balance Bike
When introducing your child to a balance bike, follow these steps to ensure a successful learning experience:
- Adjust the seat height so that your child can sit comfortably with their feet flat on the ground.
- Show your child how to walk and glide on the bike, using their feet to push themselves forward.
- Encourage your child to practice lifting their feet off the ground and balancing on the bike while walking.
- Find a flat and open area, such as a driveway or a safe park, for your child to practice on.
- As your child becomes more confident, introduce gentle slopes to help them learn to balance while descending.
By following these steps and providing a supportive environment, your child will quickly learn to balance on a bike and gain the necessary skills to progress to pedaling.
Removing Pedals and Mastering Balance

Once your child has become proficient in balancing on a balance bike, it’s time to remove the pedals from their regular bike. By doing this, they can continue practicing balance and steering without the distraction of pedaling.
Adjust the seat height so that your child can comfortably touch their feet flat on the ground. This is important for maintaining stability and confidence while riding.
With time and practice, your child will master the art of balance and be ready to progress to the next step – learning to pedal and riding a fully functional pedal bike. Removing the pedals allows them to focus solely on balance mastery before introducing the complexity of pedaling.
To remove the pedals from the bike, you’ll need a pedal wrench or an adjustable wrench. Here’s how to do it:
- Flip the bike upside down and make sure it’s secure.
- Locate the pedal on the left side of the bike (opposite side from the chain).
- Insert the wrench onto the pedal spindle and turn it counterclockwise to loosen it.
- Once it’s loose enough, rotate the pedal manually to remove it completely.
- Repeat the process for the pedal on the right side of the bike.
Once the pedals are removed, make sure there are no sharp edges or protruding components that could harm your child. Inspect the bike for any other potential safety hazards.
Encourage your child to continue practicing balance and steering on their pedal-less bike. Gradually, they will develop the necessary skills and confidence to ride a pedal bike without any difficulty.
If you’d like some extra guidance, here are a few tips to help your child during this stage:
- Have them practice gliding and balancing on their bike for longer periods.
- Encourage them to use their feet to push off and maintain momentum.
- Find gentle slopes or hills for them to practice going down while keeping their feet off the ground.
Remember, it’s important to monitor your child’s progress and provide support and encouragement along the way. Each child learns at their own pace, so be patient and celebrate every milestone achieved.
Next, we’ll explore the process of transitioning your child from a pedal-less bike to a pedal bike and introducing them to the world of pedaling.
Pedal Power: Introducing Pedaling

Now that your child has mastered balance and steering, it’s time to take their bike riding skills to the next level by introducing pedaling. This crucial step will help them gain the confidence and ability to ride a pedal bike independently.
To start pedaling, begin by reattaching the pedals to your child’s bike. Make sure they are properly aligned and tightened. Once the pedals are in place, teach your child the proper motion of pedaling. Show them how to push down on one pedal while using their other foot to push off the ground. Encourage them to maintain a smooth and consistent pedal motion.
While teaching pedaling, it’s important to emphasize the use of hand brakes. Make sure their bike has hand brakes installed, as this will allow them to stop the bike safely and effectively. Teach your child how to grip the brakes securely and use them to slow down and stop the bike when needed. Practicing and mastering this skill will give them the confidence to explore different riding environments.
Safety Tip: Remind your child to always pedal back a half rotation before coming to a stop. This helps them position the pedals correctly for the next start and prevents any accidental slips or trips.
With practice and guidance, your child will become more comfortable with pedaling and gain confidence in their riding abilities. Encourage them to start with shorter rides and gradually increase the distance as they become more proficient. Before long, they will be enjoying the freedom and excitement of riding a bike with ease.
| Pedal Power: Introducing Pedaling |
|---|
Turning and Steering

As your child becomes more confident in pedaling, it’s time to introduce them to the next skill: turning and steering. Learning how to make turns is crucial for safe and enjoyable bike riding. By mastering this skill, your child will be able to navigate corners and maneuver their bike with ease.
Start with easy, sweeping turns in a spacious area to give your child room to practice. Encourage them to lean their body and bike gently in the direction they want to turn. Emphasize the importance of maintaining balance while turning by distributing their weight evenly on both pedals.
To make sharper turns, teach your child the technique of countersteering. Explain that when they want to turn left, they should gently steer the handlebars to the right first. This action initiates a lean to the left, allowing the bike to smoothly follow the desired path. Similarly, when turning right, they should steer slightly to the left.
Reinforce the concept of gliding and balancing while making turns. It’s important for your child to avoid any sudden or jerky movements that can throw off their balance. Encourage them to maintain a smooth and steady motion as they navigate the turn.
Gradually introduce your child to more challenging turns as their skill level improves. Practice turning in tighter spaces, such as through cones or obstacles, to enhance their agility and precision. This will help them build confidence and become comfortable making turns in various situations.
Remember to always prioritize safety while teaching your child to turn and steer. Make sure they wear a properly fitted helmet and other protective gear. Choose appropriate locations for practicing turns, such as empty parking lots or quiet streets with minimal traffic.
With practice and guidance, your child will develop the necessary skills to balance and steer their bike confidently. They will soon be able to roll down hills, navigate corners, and explore their surroundings with joy and independence.
Common Mistakes to Avoid When Making Turns
| Mistake | Correction |
|---|---|
| Leaning too much or too little | Encourage your child to find a balance in their leaning while making turns. Remind them to distribute their weight evenly on both pedals. |
| Using the front brake while turning | Teach your child to avoid applying the front brake while making turns. This can cause the bike to skid and lose balance. Encourage them to use the rear brake to slow down. |
| Turning too sharply or abruptly | Help your child understand the importance of smooth and gradual turns. Encourage them to maintain a steady and controlled motion while navigating corners. |
| Not looking ahead | Emphasize the importance of looking ahead and scanning the path while making turns. This helps your child anticipate any obstacles or changes in the terrain. |
Stopping and Safety Measures

Teaching your child how to stop their bike is an essential part of bike riding. It’s crucial to ensure their safety and the safety of others on the road. Whether your child’s bike has a coaster brake or hand brakes, it’s important to teach them how to use the brakes effectively.
Start by finding a safe location with plenty of space to practice stopping. Teach your child to anticipate obstacles and stop when necessary. Emphasize the importance of maintaining control and balance while coming to a stop.
If your child’s bike has a coaster brake, instruct them to pedal backward to engage the brake and slow down. Encourage them to practice using the coaster brake for smooth and controlled stops.
For bikes with hand brakes, teach your child to squeeze both brakes simultaneously to bring the bike to a stop. Show them how to gradually increase the pressure on the brakes for a controlled deceleration.
Reinforce the use of protective gear, such as helmets and pads, to ensure their safety while riding. Explain the importance of wearing a properly fitted bike helmet to protect their head in case of falls or accidents.
Practice stopping and braking techniques with your child until they feel confident and comfortable. This will help them develop good habits and become more aware of their surroundings, fostering responsible bike riding.
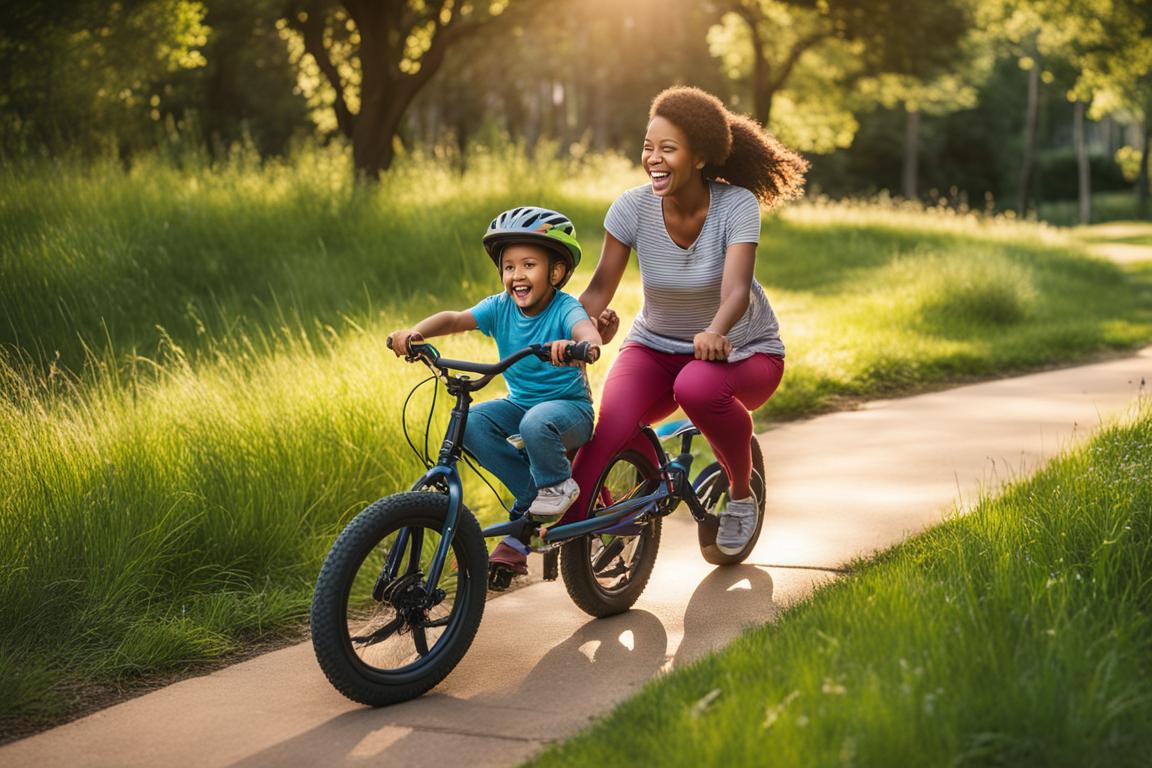
Riding with Confidence and Independence
As your child becomes more proficient in riding their bike, encourage them to gain independence and confidence. Instead of relying on constant supervision, let your child ride on their own and explore different terrains. By allowing them to practice various bike skills, they will gain the necessary experience and develop confidence in their abilities.
With continued practice and support, your child will master pedaling and gain the necessary balance to ride a pedal bike confidently on their own. Encourage them to pedal forward and maintain their balance as they ride. Remind them of the techniques they have learned, such as using their feet to gain stability and adjust their balance when needed.
It’s essential to create a safe and supportive environment for your child to ride independently. Choose areas with minimal traffic, such as parks or designated bike paths, where they can freely explore and practice their riding skills. Ensure they have the appropriate safety gear, including a well-fitted bike helmet, to protect them in case of any accidents.
As your child gains more experience riding independently, they will develop the skills and confidence to navigate different terrains, face challenges, and make safe decisions on their own. Remember to provide positive reinforcement and praise their accomplishments to boost their self-assurance.
By allowing your child to ride independently, you are empowering them to become more self-reliant and fostering a sense of freedom and accomplishment. Riding a bike is not only a fun activity but also a valuable life skill that promotes physical fitness and outdoor exploration.
Conclusion
Teaching a child to ride a bike is an exciting and rewarding journey that helps them gain confidence and independence. By utilizing effective methods and prioritizing safety measures, you can guide your child towards becoming an independent bike rider.
Throughout the teaching process, it is crucial to emphasize the importance of safety. Ensure that your child wears a properly fitted bike helmet and follows all safety guidelines. Celebrate their progress and encourage them along the way, building their confidence as they master each new skill.
With patience, practice, and a supportive approach, your child will soon be riding a bike confidently on their own. The joy and satisfaction they experience along the way will not only create lasting memories but also equip them with a valuable life skill. Teaching a kid to ride a bike is not just about balancing and pedaling, but about giving them the tools to explore the world with confidence and independence.
Also Read : Get Your Best Workout With Beachbody Bike Today!
FAQs
Q: At what age should I teach my child to ride a bike?
A: Most children are ready to start learning how to ride a bike between the ages of 3 and 6, but every child is different. It’s important to look for signs that your child is physically and mentally ready, such as being able to follow instructions and having enough coordination and strength.
Q: How do I teach my kid to ride a bike without training wheels?
A: Start with a balance bike or remove the pedals from a regular bike to allow your child to focus on balance first. Then, find a safe, flat, and soft surface for them to practice on. Hold the bike while they’re getting the hang of it, and gradually let go as they gain confidence.
Q: Should I use training wheels to teach my child how to ride a bike?
A: While training wheels can provide extra stability and help build confidence, they can also prevent the development of proper balance and coordination. Consider using a balance bike or removing the pedals from a regular bike as an alternative to training wheels.
Q: What bike size is ideal for teaching a kid how to ride?
A: The right bike size is essential for a child’s comfort and safety when learning to ride. Ensure that your child can touch the ground with their feet while seated, and their knees are slightly bent when they pedal. A smaller, lightweight bike is often easier for kids to handle.
Q: What are some tips for teaching a kid how to ride a bike?
A: Patience is key! Start by teaching them how to properly use the brakes and to always look ahead. Encourage them to balance and steer by looking straight ahead instead of at their feet. Praise their efforts and progress, and be prepared for falls and setbacks.
Q: Is it necessary to hold the bike while teaching a child to ride a bicycle?
A: Holding onto the bike while your child learns to balance and pedal can provide reassurance and stability. Gradually offer less support as they become more comfortable, always keeping an eye out for any potential accidents.
Q: What steps can I take to teach my child how to ride a bike?
A: Start by ensuring that the bike is the right size and that your child is wearing a helmet. Begin with teaching them how to balance and steer, then move on to pedaling. Use positive reinforcement and encouragement to build their confidence.
Q: When can a child start learning to ride a bike without training wheels?
A: Children can start riding without training wheels once they have developed a good sense of balance and coordination. This can vary from around 3 to 8 years old, depending on the child’s individual abilities and confidence.
Q: How can I get my child to start on a balance bike before transitioning to a pedal bike?
A: Balance bikes are a great tool for teaching kids how to balance and steer without the added complexity of pedaling. This can help them gain confidence and feel comfortable on a bike before transitioning to a pedal bike.
Q: Should my child’s bike have hand brakes when they start learning to ride?
A: Hand brakes can be helpful for teaching kids how to control their speed and stop, especially as they transition to larger bikes. Ensure that the child’s bike is equipped with hand brakes and teach them how to use them effectively and safely.
Source Links
- https://www.bikeradar.com/advice/skills/how-to-teach-a-kid-to-cycle-in-30-minutes/
- https://www.twowheelingtots.com/how-to-teach-a-child-to-ride-a-bike/
- https://www.rei.com/learn/expert-advice/teach-child-to-ride-a-bike.html